Colin Paterson's Elephant Toenail Project
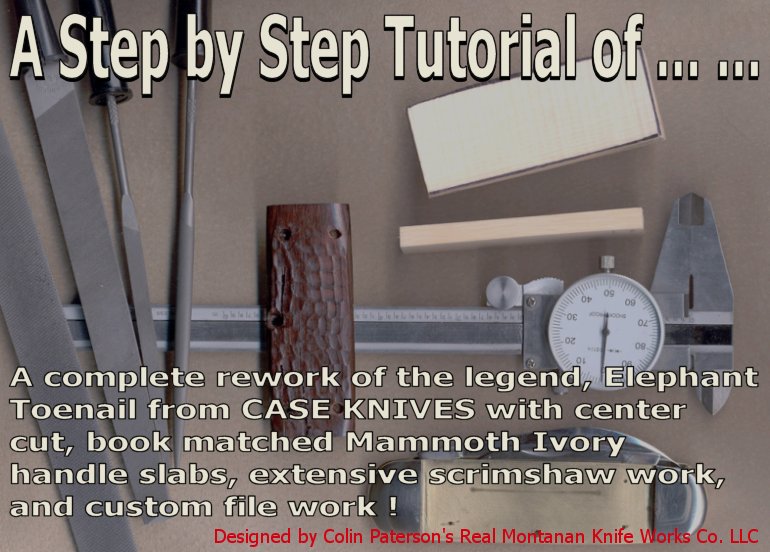
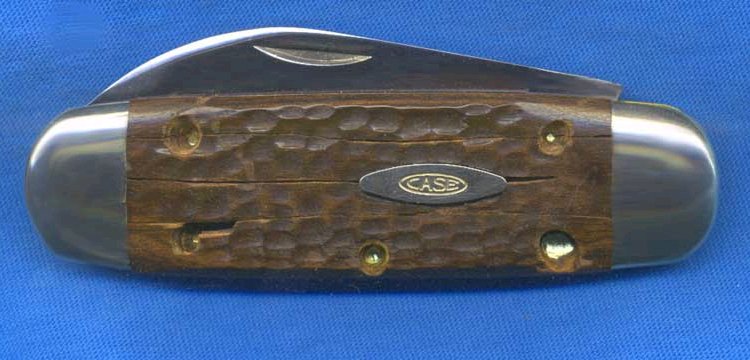
 This is the Elephant Toenail knife that Colin will be working on. It measures 4 3/8 from end to end with the blades closed. The handle slab measures 3" long, and 1 1/8" wide. That adds up to 3.375 inches or about 3 1/3 square inches of area per side that will be worked on. The Wooden Slabs are to be replaced with beautiful Mammoth Ivory! If you check in occasionally you will see the metamorphosis of this knife into a piece of art created by Colin Paterson of Real Montanan Knife Designs Co.
 Here the Elephant Toenail has been carefully reamed into by a rotary tool with an appropriately sized and newly sharp carbide bit. The goal being to grind down to the liners. Being very careful at this point NOT to grind through the liners! Safety, and planning your work are two of the most important aspects of this phase of the handle slab change out. It should be noted here that it is most important to maintain control of the dremel or other rotary tool so that you do not JUMP out of the working area and mar either the exposed blades or the bolsters! This CAN HAPPEN very easily! I like to use NEW SHARP bits for this type work. And also running at MAX speeds seems to reduce bit chatter and the consequent loss of control. If the bit gets dull, bit chatter is much more likely to occur. A steady hand is a must here also and I suggest trying this approach on a cheap junker knife before doing it to a keeper and collectable knife like this one. After grinding the pins off, I tried prying ( mustn't mar the liners!) ever so carefully the wooden slabs off the liners with no luck what so ever. It would seem that they had swollen and where caught tight between the bolsters. So I split the slab in three places by placing a rubber mat down and laying the knife on it. Then I used a small hammer and a very sharp chisel to split the wood, using a twisting action to spread the splits open and then carefully lifted them out one at a time.
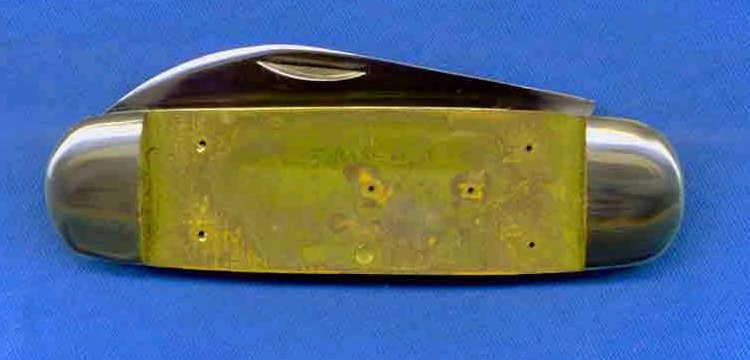 Here we see the brass liner that has been oxidizing under the wooden handle slabs. The slabs are mahogany soaked with a petroleum based dye or stain.... Something that had a chemical smell to me. I suspect that there has been a secondary chemical reaction taking place as the steel CASE avatar was extremely rusty on the back side and one of the steel pins that held it in place had rusted completely through. The inside faces of the bolsters, where the wooden slab butted up, are extremely full of some sort of dye or dye and rust material that must be removed prior to proceeding. A bit time consuming but something that will save this knife for future collectors. Whether wood has been stained or not, and unless it is completely sealed on all sides, it will maintain the same relative humidity as the air around us. That can be the source of a multitude of problems with all sorts of useful items we depend on and cherish. I find wood although beautiful, to be at the very bottom of MY PERSONAL list of materials to make knife handles from....... especially high carbon knives as the rusting is a constant problem with them because of the makeup of the steel in the knife. Stainless Steels popularity in our modern time is because of precisely that among other characteristics that it possesses.
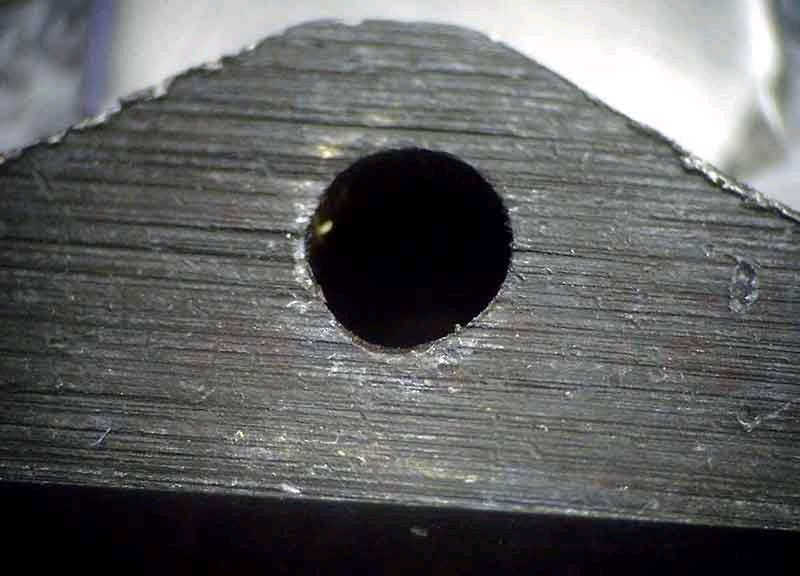
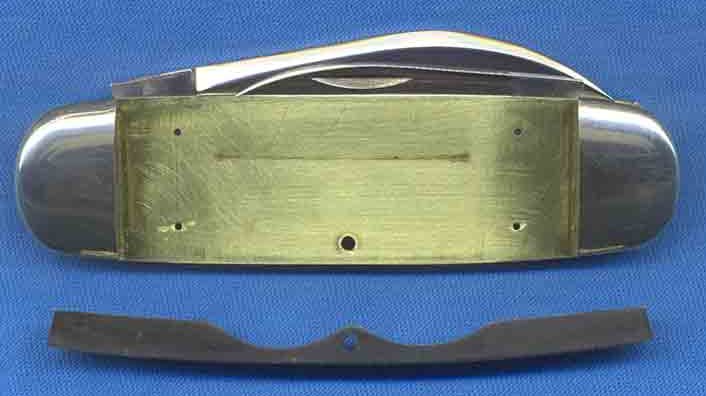 Now we are really getting down to the guts and bones- (nuts and bolts?) of this knife. The knife has been completely taken down to it's main components. If there was a broken blade, we would be going one step further to replace it! But at this point, the knife as been completely cleaned and all of the grime and oxidation has been sanded away with 220 grit wet and dry sand paper. Be sure to blow your knife out with compressed air to remove all the sanding grits or you'll be sorry! You can use the 'canned air' from office supply stores if you don't have a compressor. This part makes many people nervous because it is at this point that a knife can be screwed up permanently and that can happen without even noticing you are doing it! The key lies in that large dark hole in the liner, near the bottom edge of the knife. When you are taking off the handle slabs, you do NOT want to make that hole any larger than it is. This is CRITICAL! Go very, very slowly with whatever method you choose to remove the handle slabs. In fact, if this wasn't a special project for a good friend, I wouldn't even be replacing that 'pin'. What I would normally do is leave it a little long on each side of the knife, and then peen it, BEING VERY CAREFUL NOT TO OVER TIGHTEN IT. Because then the rocker spring ( the dark item at the bottom of photo ) would have undo pressure on it and the knife would wear excessively and in a big hurry. Also the action would be initially be terrible and the blades would be too tight and the knife would be hard to open and seem to drag because the 'rocker' spring will be pinched and won't want to rock anymore! Even oiling or using graphite will not fix an over tightened pin. The reason I am going this far is to remove the 'stressors' on the rocker spring. I personally remove and finish all of the springs when I do a complete rebuild on a knife! Next we are going to look at that spring under my microscope........... you won't believe your eyes!
 This is a photograph I took looking into the barrel of my Stereo Microscope. Why do I have a Stereo Microscope? Because that is what I do all of my scrimshander work with! One reason it looks as nice as it does no doubt! It's a whole new world working under a stereo microscope! This image is NOT scrimshaw! It is the rocker spring from the Elephant Toe Knife I am doing a complete rework or rebuild on. The harsh lines that appear across this rocker spring are called "stressors" and sometimes they are good and sometimes they are bad. Just like we humans, we need some stress to work efficiently and keep up stimulated. Too much stress.... stress to the max, and well, we can break! And many folding knife or pocket knife springs DO break! It stands to reason then that the wrong kind of stressors and stressors that put too much stress on your knifes spring will cause it to have a shorter life and can even cause your knifes spring to break! There is something that you can do about that though. You can 'dampen' the over stressed parts by softening some of the stressors and then where there are stressors that should NEVER be, we can do our best to eliminate them all together...... look at the next picture for some stressors that in my opinion, should not be there at all!
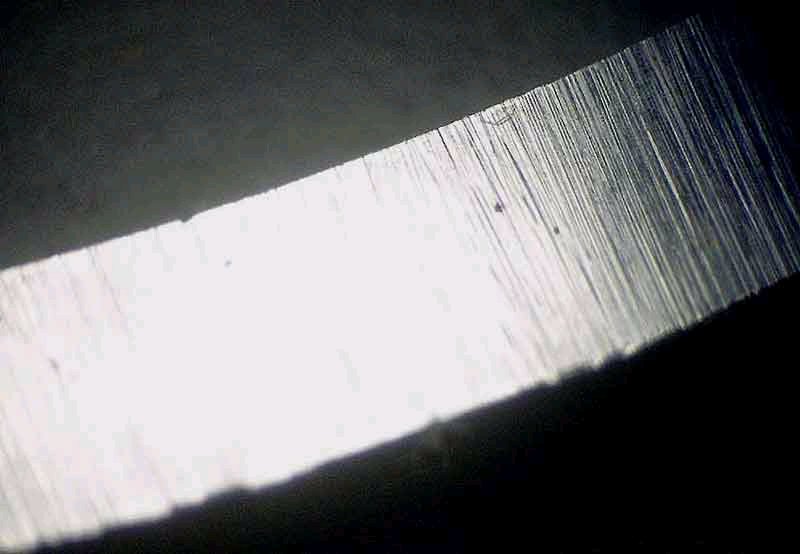 Notice that these ridges and grooves that are running across the steel rather than down the length as in the previous image. This is looking at the steel inside the curve of the rocker spring if you refer back to a previous photo. The exact area where it should be smooth as glass. The stressors that run length ways along the length actually add strength to the springs tension, but where it moves at pressure points it should be sanded and buffed smooth. That would be at the pin, and where the blades themselves rub on the spring! The grooves and ridges in the above photo offer the steel a place to break! By polishing it smooth as a mirror, the life of the spring, will be extended dramatically! And, who wants to see their pride and joy broken when if a little bit of hand work in the right places could have prevented it. Here we are highlighting the major difference between handmade knifes and factory knives. But why not fix a factory knife if you have a reason to have one apart to begin with?
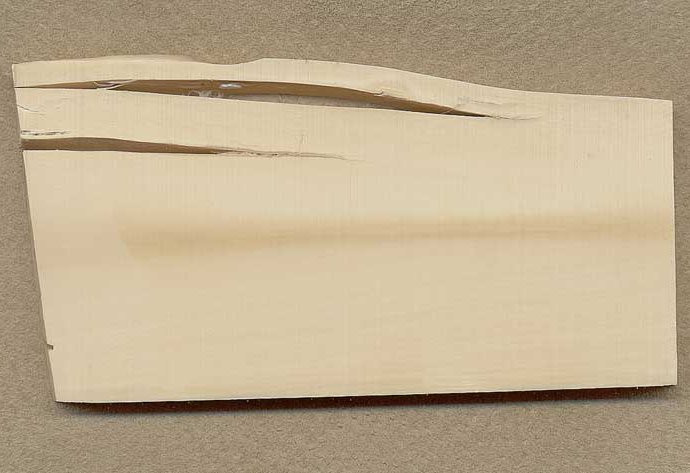 I thought I would change the background color for the IVORY just because I think it looks a bit nicer! So, anyway here we have a freshly sliced slab of Mammoth Tusk Ivory. The cracks at the top of the image represent the outside of the tusk. The tusks when see from the end, remind one very much of a tree, however the design has a 'double helix' running through it, it is still formed in layers. So, it is those outer layers that you see naturally separating from the main piece. The dark line in the center is just exactly that! The center or core of the entire tusk. Once again, because this is a special project for a good friend, I chose from the 7 slices that made up the whole of this section of tusk, the two 'center cuts'. The side you are viewing has been sanded just to start getting the saw marks out. Next, we will draw the size and shape of the new handle slab on the ivory.
 I have marked out my replacement handles many different ways. As many ways as I've been able to think of.... and this one, for me, proves to be the simplest and most fool proof... KISS! I used to use a sharp pencil and then saw the line..... or sometimes I would scribed a line around the old handle if I had it. Cut to the outside of the scribed line and then sand to the scribed line and call it good After playing around, ...... I like the marker. Quick, easy, and it stays there while you work the ivory for a while anyway. If you have the old handle slabs, lay them in the best place on your big piece. By that I mean to inspect the ivory piece and look for cracks and the like and also look it over for thickness to. When you find the best spot to take the ivory, firmly hold the old pattern piece down and quickly trace around it. You now have a water proof mark. And a good saw line. You will see and read about the sawing in another step or two. But now I think is a good time to talk about sanding ivory. I learned the hard way that you don't let the ivory get hot when sanding it. While of course you want your rough pieces to be a bit oversized in ALL directions including thickness. It is during sanding the roughed out handle slab for thickness that it can get really hot, all the way through the piece. And the result will be, either now or later.... and not even that much later. Cracks! A crack or many parallel cracks from the growth rings. The cracks will work their way in from the ends of your pieces. I worked on a piece for about a month when it began to crack! And I was nearly done with a very involved scrimshaw design when the cracking began! At first, I thought that I would be able to hide the cracks which where less than an 1/8" long by putting a border around the outside. Just as I came all the way around to my starting point, I noticed when inking the scrimshaw that the cracks where at least twice as long as they where when I started to put the border around the outer area of the face of the piece! Tossed it right in the round file after all the time, effort, and materials. So, now, I use a 120 grit belt and dip my ivory in a water bucket I have beside me each and every time the ivory heads for the sanding belt! From the very first time the ivory hits the sanding belt, it is WET! Not only does this completely stop the cracking, because the ivory NEVER gets hot let alone warm, but it also puts an END to the dusty atmosphere that I used to have to put up with. The room where I sand used to cloud up with ivory dust in nothing flat! Now, using the wet sand method, the sanded material is no long in the form of dust, but is sort of a 'curd' if you will. And they stick to the end of the ivory stick and fall away in the bucket of water. Next we will saw the ivory handle slab from the larger piece.
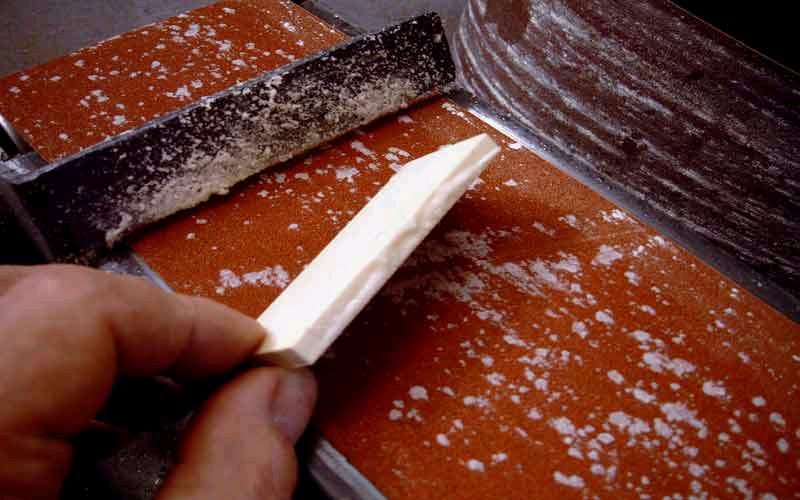
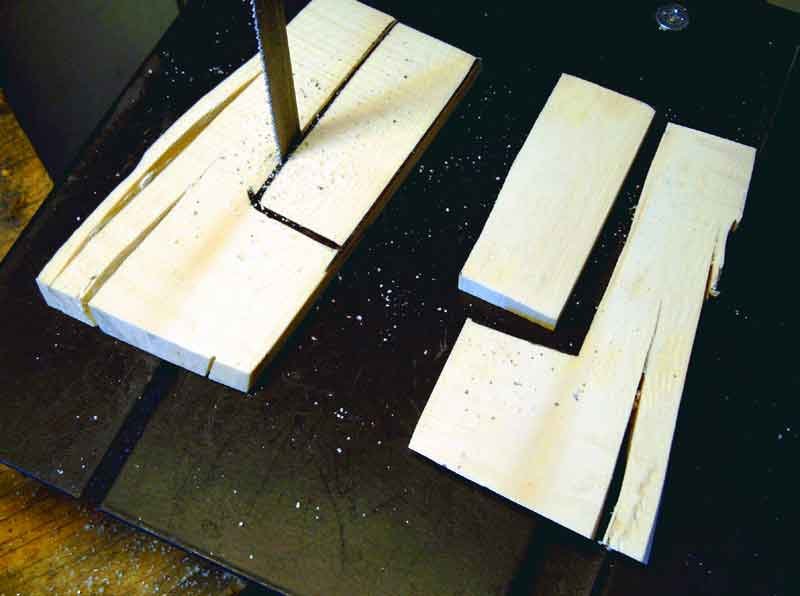 Here the new handle slabs are being cut from a set of ivory pieces taken from the very CENTER of the tusk and the cut pieces are what is referred to as a matched, book, set. Nothing to do with a book of matches that you'd light a fire with, but rather the face of the piece on the left was part of the face of the piece on the right and when it was sawed open for the world to see after 10 to 30 thousand years of being together! They have been opened like you would open up a book! So, they are a matched set and "book faced" also. A "matched book set." Again, you will not always be able to do this as there are only one set of center cut matched book sets per cross sectional piece of ivory. The Sharpie marker line is easy to see and easy to cut down. Keep the blade in the middle of the black line. Easy enough to do considering how wide a marker line is. And that is OK because now we will get ready for the final sanding where we let the sanding machine..... do most of the work. We will incorporate a couple simple files in the "finish and fit" process. Be sure to save your 'cut off' pieces. Of course you can find pieces of ivory to use that are closer to the size you need in the first place but if not, put the cut off's in a handy place for the next project. Lets take a look at the two pieces we have just cut out.......
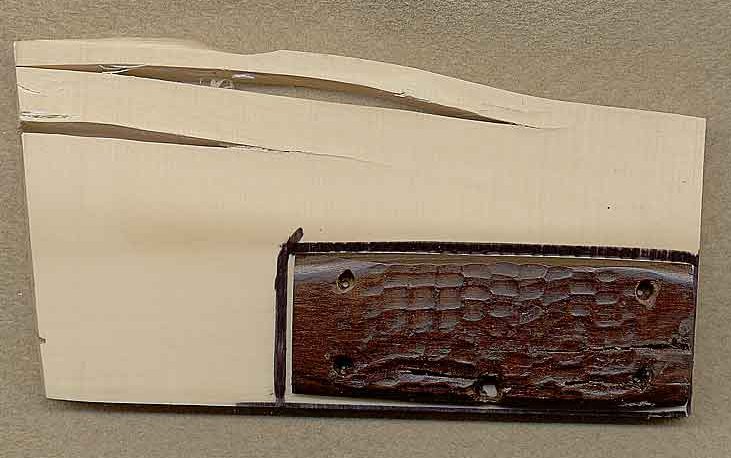
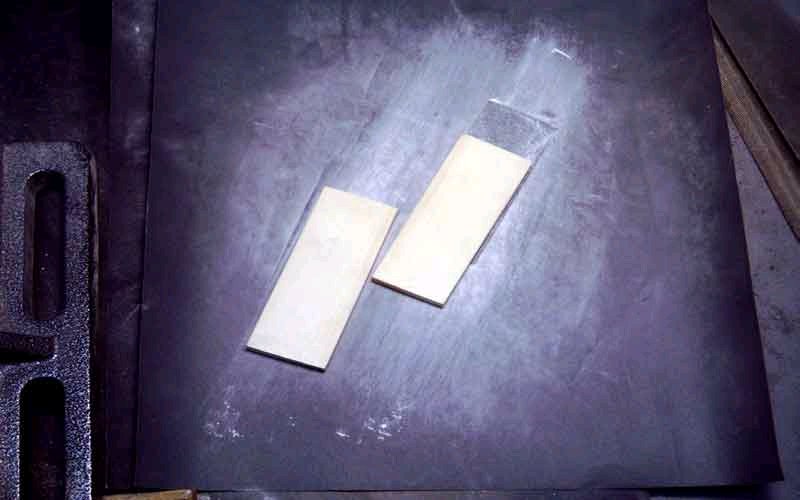
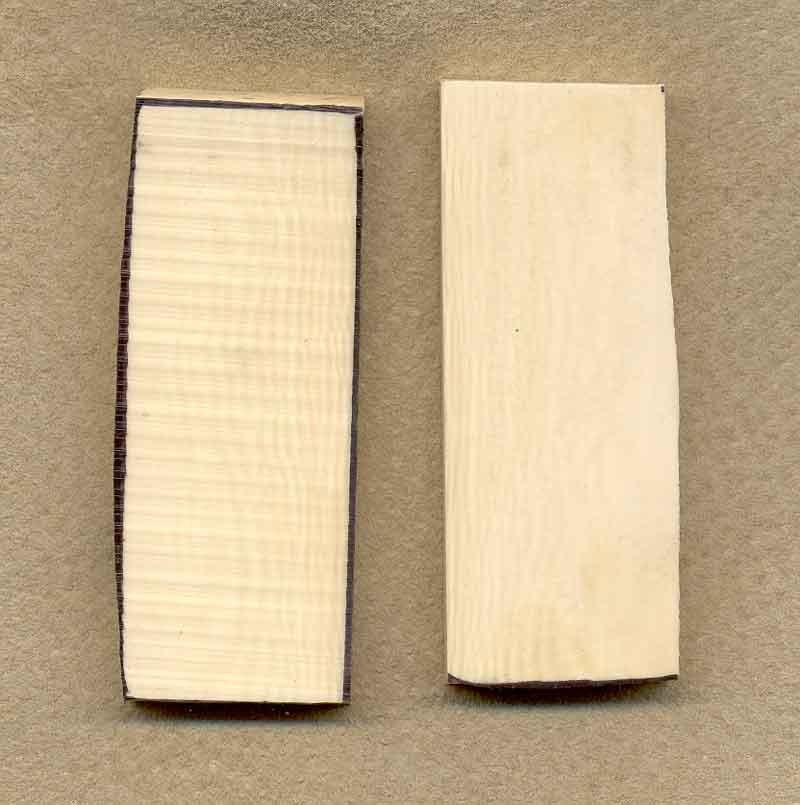 Not too much to see here, but there is one thing to notice. In addition to the black marker pen lines, the piece on the left has the saw marks left from sawing it or "ripping" it from the ivory cross section. The piece on the right has had the matched book face sanded just to show the difference in the two pieces. Notice the nice 'grain' in the piece on the left. As was pointed out in the previous photos, these are book faced pieces. And yes, they are laid out here in a book faced manner. I believe it must be the way the saw cuts gather the light that makes the iridescent design appear stronger in the piece on the left than in the sanded piece on the right. We have plenty of ivory all around on every side so there is no reason to worry about coming up short as we sand and check the fit, sand and check for fit, and continue sanding and checking our fit until, one time or another, one will just drop right in place! Then we will have a new ivory handle! Repeat the effort one more time and it'll be time to do a little scrimshaw! Next, we'll go back to the sander and then some filing and the final "dry" fitting before the scrimshaw design gets laid out on the ivory. You will always be able to see the distinctive design in the Mammoth Ivory from the growth lines. It will be necessary to 'twist' and 'turn' the piece in the light to see it after it has been finished to a high gloss.
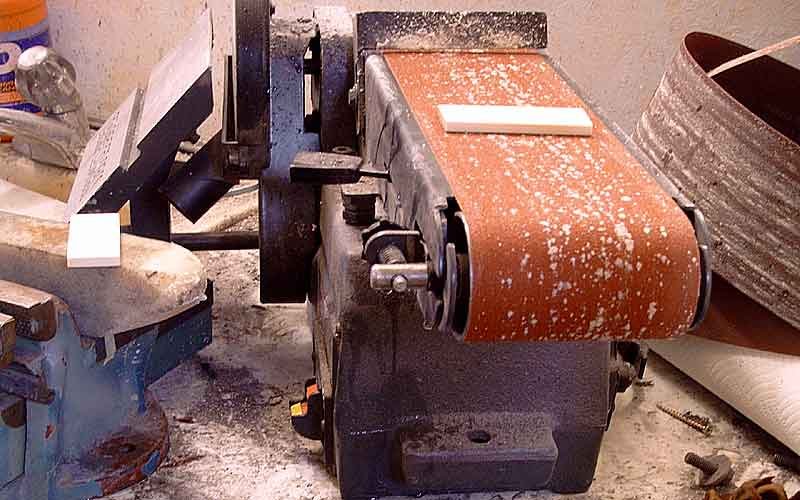 Notice in the picture that there is a second piece of ivory lying off and just left of the bench sander. That piece of ivory is setting on a big erasure type thing that is used to clean material out of the sanding belts. I used to use that thing a lot when I ground IVORY. But I have unearthed a method of sanding ivory, bone, and horn that is almost 100% dust free! There was a time when the room where I sanded ivory was totally covered with powder.... it looked like a couple of sacks of flour had been tossed around inside and while actually doing the work, it used to be like a cloud in the tiny room! Now, with a couple of major discoveries that I have combined together, anyone should be able to duplicate the dustless ivory sanding method for themselves. The first thing I found was that I needed to add water. Quite a bit of water as a matter of fact. Because of size limits here I can't display the entire photo. But just out of view, down below the bottom edge of the above photo is a two and half gallon pail setting on a tall stool! And that pail is filled with cool water. Secondly and finally what really makes this idea work is the belt itself. Prior to this combination I always used a finer grained belt and the rubber erasure to size my ivory pieces. But really, the #50 GRIT Carbide Silicon belt works absolutely wonderful! The carbide silicone works because it 'refractors' always presenting a new, sharp grit to the work surface. Now the rest of this wonder can be explained only from a layman's point of view in a simple 'report' style.... I have not a single fact to offer you as to why this method works the way it does... only guesses and the fact that it does work! This is getting a bit long so please, let me show you another picture of the belt and ivory while it is being worked. More will be understood instantly, as a picture is worth a thousand words........
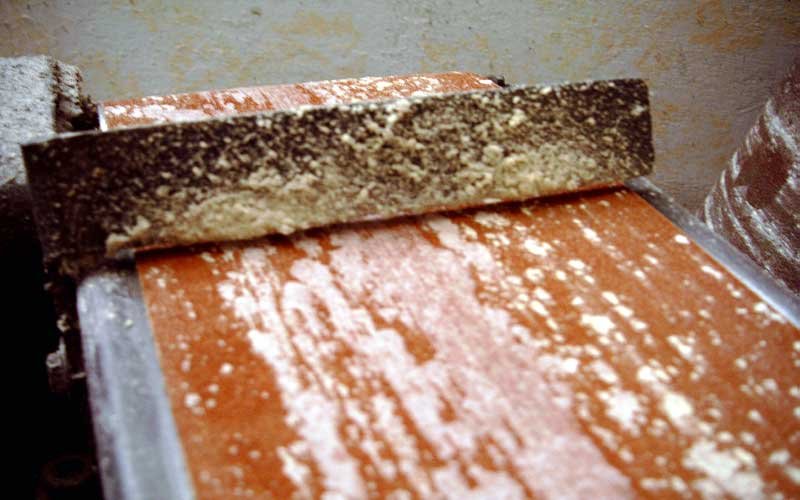
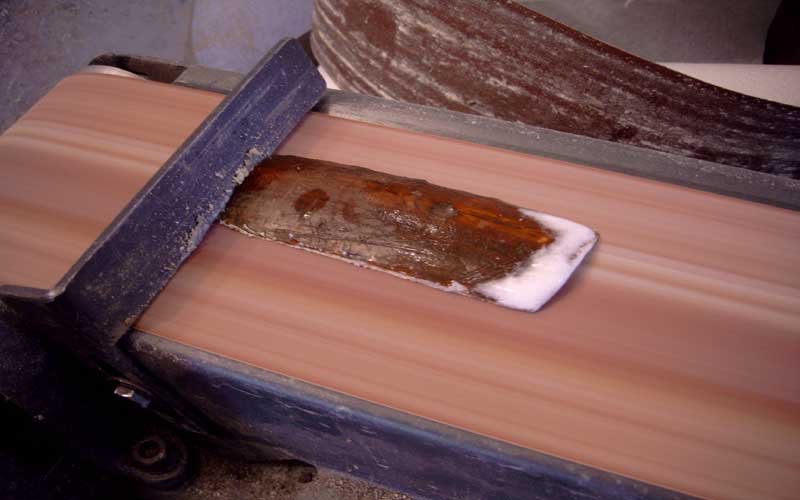 As I was saying, "A picture is worth a thousand words", and this one says much about the dustless or near dustless technique for sanding ivory and more. That is a piece of Mammoth Ivory Bark, or outer shell riding along on the #50 Grit Silicone Carbide there. And yes, that is a head of foam, ivory and water foam on the end there! The foam is made when I dip my right hand into the bucket of water just off camera right and then let the water dribble from my fingers that I have formed into a 'cone' shape with all four fingers and my thumb pointing downward just in front of the piece of ivory..... almost instantly the foam appears. For any of you out there that have used your delicate digits to hold a piece of ivory, or bone, or horn, or whatever..... for those of you that have done this know ( especially those whose fingers have found their way to the grit! ) it is a very dangerous and tenuous thing to do! I have in an instant sanded terrible slots in my fingernails once, and on too many occasions I have in an instant lost my finger prints on one or more digits! It is something you can never forget! Well, putting all this water on the belt does something to save you from all that to boot! I'm drifting again...... I think what happens is that the water is like a lubricant. Then, because of the swiftness of the moving belt, much of the water is hurled off the belt and what isn't instantly tossed off, begins to evaporate at max speeds. Until critical mass is reached with the evaporation, the ivory and your fingers just seem to float over the grit! No, don't sand your finger to see if it floats! It won't! Anyway, if you are poised holding the work on the belt a good distance away from the cross bar, at a peculiar point in time, something unexplainable happens and the ivory begins to grab.... gently at first and then more and more firmly... it is at that point, that the ivory 'curds' if you will begin flying off the back end of the ivory piece you have below your fingers. It's sort like surfing. You want to stay right in the sweet spot on the belt. If you give in to the power of the belt, all is lost and the piece of work goes flying who knows where and you find it and try again. IF you can sense the power and work it, stay with it, and let it grind the ivory away, you can expect to reduce the overall thickness by a good .10 of an inch with each short effort! And at the end of each effort you shoot your piece of ivory off the end of the sander into the bucket of water. The ivory never, ever even gets warm this way.... which to those of you who know, means it should never, ever get cracks in it like it will every time if you try to finish it and get it HOT. You can see that there is very little of the ivory 'curd' built up in this photo.
 I just pointed out at the close in the previous photo that the ivory 'curd' had just started to build on the cross piece....... well, here it is after I've been at if for a little while! All of that goo and more, the heavy curd that sticks to the piece being worked, would be a cloud of fine white dust looking for your lung tissues to cling to if it weren't for the water and the heavy #50 Grit Silicone Carbide sanding belts. I prefer Klingspor. Or at least that's what I was using when I discovered that I could really change the behavior of both the way the ivory sands down and the way the belt doesn't clog up! When you want to, just add water and bear down with a wooden stick and flash-! It's all gone and the belt is clean as a whistle. Take the same stick and swipe the crossbar and all the gooy curd is off to. I have explained it as well as I can. The rest is up to you. You can start by looking at a few more photos of the process and then just give a try yourself!
 There, that is what the beginnings of the foam look like on the side of a nice piece of mammoth ivory! Notice the crud on the cross bar!
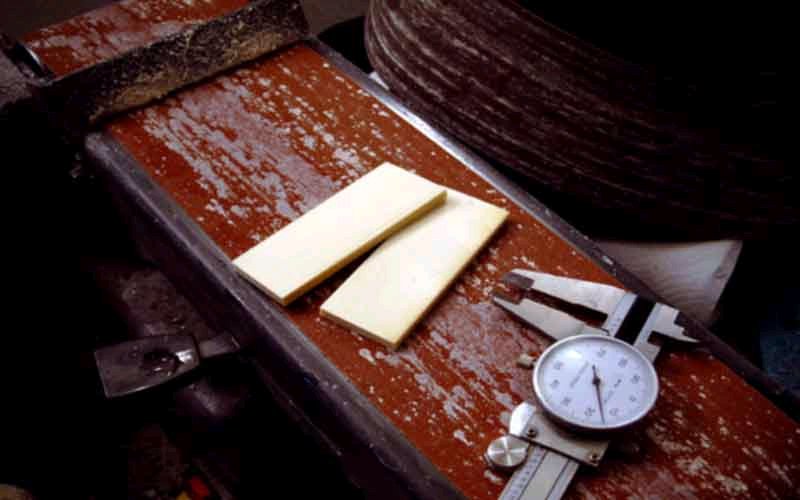 Any other tools, like squares, straight edges, calipers, dividers or other measuring devices help the job come out right the first time!
 I had to show the water bucket! There is where I like it. I just dip the piece I'm working on it the water and put it up on the belt, or I can hold the work piece with my left hand and dribble more water on with my right. Very handy. Always make sure you are using a ground fault breaker when combining water with electricity. And never work with a tool like the above without wearing proper eye protection. Last, but not least. Even though the belt is a heavy duty #50 Grit belt, the ivory because of the addition of the water comes out smooth enough from here that you need only to let it dry for about 20 minutes and then finish it with a sheet of 250 followed by a sheet of 320 just like in these last two photographs.............it amazes me that the ivory is so smooth after using such a rough grit!
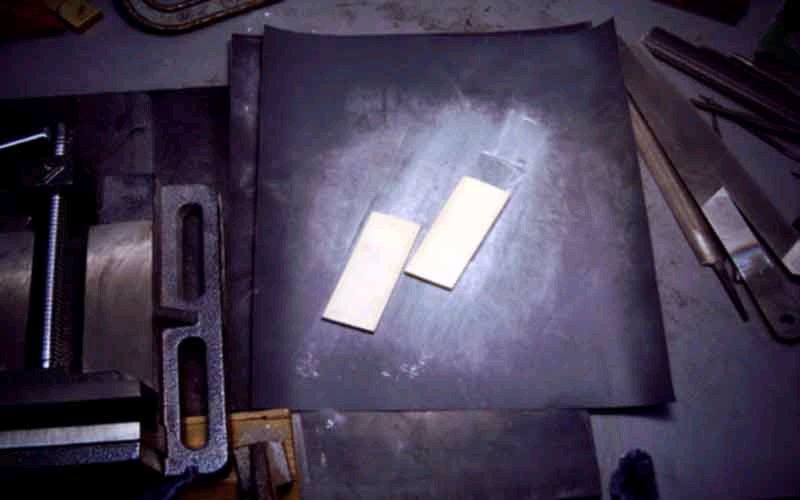 The water and #50 Grit belt should bring you with in less than a sixteenth of your finish dimensions. And for a finish surface on the face of your worked piece, you will find you are closer than you'd thought possible coming from a #50 Grit! I sure did. I simply lay a sheet of 250 grit down on a flat surface.... you see a sheet of black vulcanized rubber there under the black sandpaper, and hand sand all but the back side which is so smooth that it will actually have to be roughed up some before I can mount it to the knife! This is where I haven't found a way to beat the dust. Small price to pay for the quick and dust free way of going about it.
 Virtually the same thing only I lay down a sheet of 320 grit wet and dry paper.... this will do it. Any further and it is a waste. I go from the 320 grit to the buffer. And then turn my pieces in a bright light. If I can find a little bit more to do it is at that point that I'll decide to go back to the 320 or go all the way back to the 250 if I really wasn't paying attention! Then off to the buffer and a little bit of my favorite for ivory and that's Fabuluster compound. The white compound will bring the ivory to a high luster in the snap of your fingers! It never fails to excite me to turn a finely sanded and highly polished piece of ancient mammoth ivory under a bright light! The ivory has a rare magic all it's own! Happy Polishing!
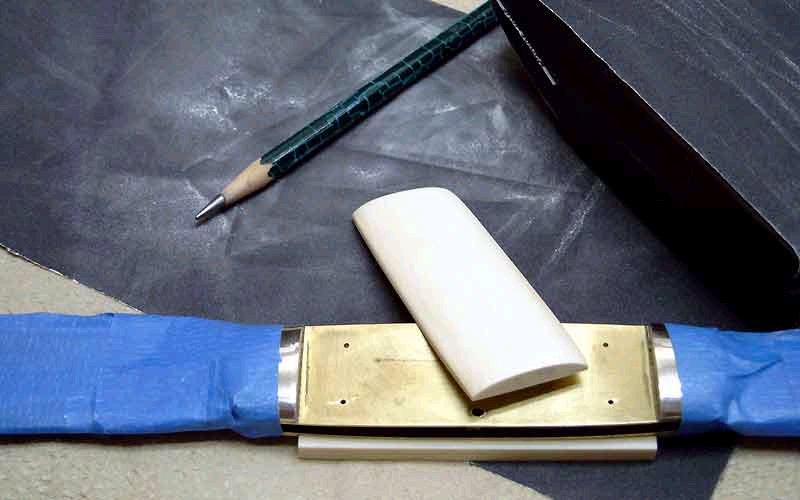 SHAPING THE IVORY TO FIT THE KNIFE.................... The task of fitting the Ivory slab to the bolsters is a relatively simple one compared to getting the ends flush and the over all length correct. I start by taping off the blades and I make sure to tape them to the bolsters because as you know from the previous steps, there is no back spring in the knife and the blades will flop back and forth in both directions. Because I put the ivory in and take it out repeatedly checking for a perfect fit, this is an easy stage of the process to get a cut. The tape makes it much easier to keep your mind on fitting the ivory slabs because you're not having to worry about the sharp blades cutting you. It is a simple task of putting the ivory in the knife while double checking both slabs that somehow they have not gotten switched or turned around. Not even factory made knives are perfect and so it is, that these little imperfections can cost you all your time and materials you have in the reconstruction process if you don't pay attention! Once you are satisfied that you have fit the slabs to their proper sides, go ahead and use a sharpened lead pencil to mark all the way around the slab and also scribe a line over the bolsters on both ends. Then just begin sanding away the ivory being sure to use a flat sheet of 220 grit paper that is flat on your work surface. (see photo) While keeping an eye on the pencil lines, sand right up to the line. When you have sanded to the pencil line all the way around the handle slab, put it back into the knife. Adjust if needed- but by now there should only be the thinnest of margins left along the edges of the ivory slab and the same tiny "reveal" left above flush on the bolster ends of the ivory. At this point, take a sanding block with used 220 grit or new 400 grit and 'float' it along the edges and over the ends and down the length and melt, if you will, all lines together. Slowly working and checking the ivory slab's silhouette by turning the piece near a strong, single light source until you feel it is finished. That should be it...other than, know when to quit and don't over do it!
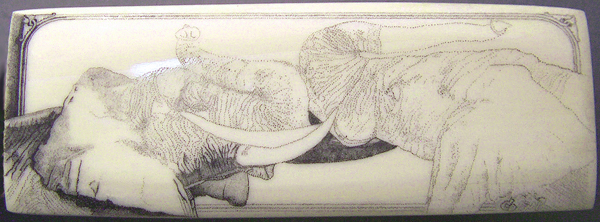
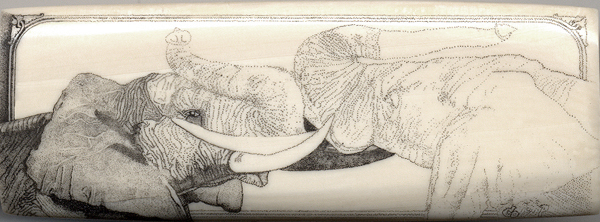
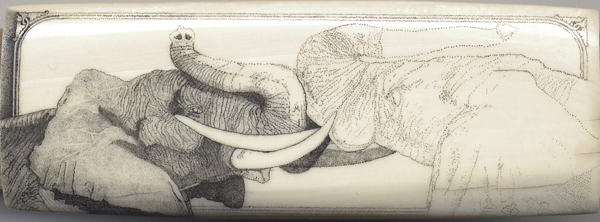
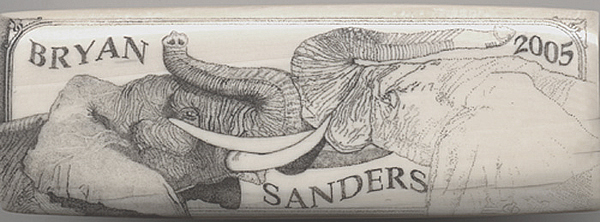
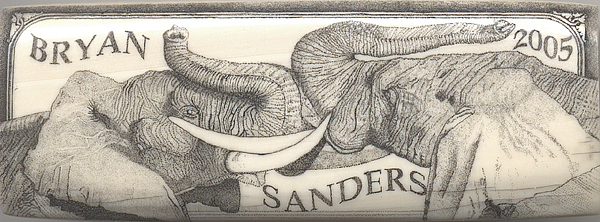
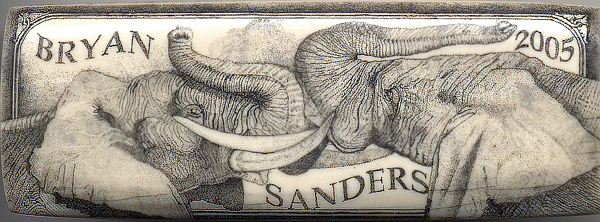
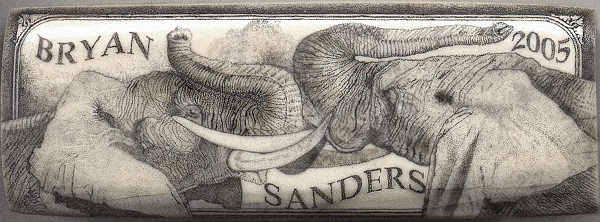
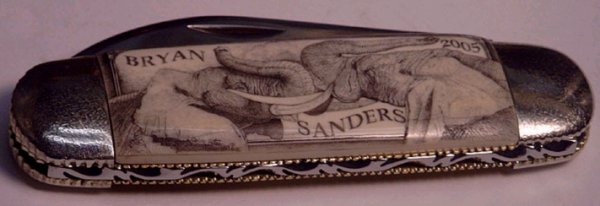
This is the scrimshaw portion of Colin Paterson's Elephant Toenail project. It will be a visual progression of a long process that involves poking holes in the ivory one by one & filling them with ink to create a beautiful image. Colin modified this knife for Bryan Sanders in 2004/2005. At the time of writing, it is Bryan's favorite knife he owns. Mr. Paterson's scrimshaw is outstanding!