Day 1
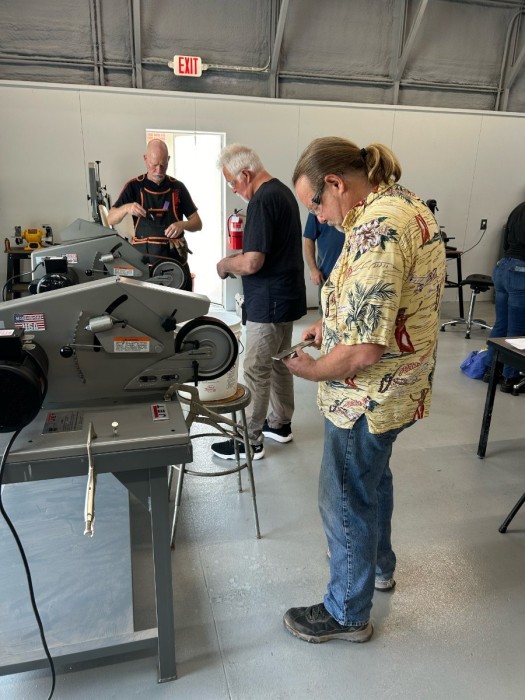
I arrived at my class about 10-minutes before the start and was greeted by 8 men and 1 woman and the instructor Ed VanHoy. Brunswick Community College recognized the expanding community of studio-based creative artisans and the role of the arts, entertainment and tourism in the economic development of North Carolina. As such, they built a new building specifically dedicated to knife making, ornamental blacksmithing, and metal sculpture complete with brand new chop saws, grinders, band saws, welders, etc. My class is the first class to use the new facility and equipment.


The vibe from the beginning was relaxed, informal and supportive. A few of my classmates had prior experience with forging, grinding and finishing but most of us were scratching an itch for the first time and simply seeking another life experience. After the business of confirming the class roster and brief introductions, we jumped right into designing the knife that each of us was planning to produce by the end of the class. The instructor explained that a balanced knife should feel comfortable and easy to handle, with the weight distribution being a key factor in ergonomics. He further explained that the size and proportions of the blade and handle should be appropriate for the tasks the knife is intended for.

The first lesson that Ed taught us was the “Golden Rule (2/5 and 3/5)” which establishes the blade-to-handle length. In essence, the total length of the knife can be related to the blade length using the golden rule, with the handle contributing the remaining proportion. I designed my knife to have the blade length be 1.6 times the handle length. The golden rule will also be applied to other aspects of my knife, such as the thickness of the blade, the vertical and horizontal control lines and the spacing between handle pins, to create visually appealing and balanced proportions. While the golden rule can be a helpful guide, we learned that ultimately, the handle-to-blade ratio is determined by the intended use of the knife and the desired balance of the knife.
Next, we learned that the golden rule could contribute to a knife's aesthetic appeal, but ultimately, the proportions should also be pleasing to the eye. The instructor explained to us how knife makers often develop their own unique styles and preferences, and the golden rule becomes just one of many tools they can use to achieve their desired aesthetic. The instructor made the job of designing our knives easier by having a dozen or so Lucite templates of patterns which are some of the 17,000 knives that he has handcrafted over the past 50 years. We could use these template as-is to design or knives, combine the handle of one template with the blade of another to create a new pattern or design a knife pattern that wasn’t represented in the templates. I drew 6 knives and ultimately settled a sheepsfoot pattern to be used as a small kitchen chopper that was hand drawn and not taken from one of the proven templates.

Everyone settled in on their designs quickly and once approved by the instructor, the drawn templates were cut out with scissors and the overall length of our knives were known. We then proceeded to the chop saw to cut the section of bar steel that was needed for our knives. The instructor was intentionally hands-off so that each of us could not only experience the interaction of the material with the tool, but we could claim 100% of the handcrafting of our knives without assistance. Safety was paramount to every tool that we used, and briefings were held before the use of any tool and oversight provided during the use of any tool.
We then took the cut bar steel to the grinder and using a 60-grit 2”x72” belt we de-burred both ends and debarked both sides of the bar steel. Here we learned the fine art of plunging the material into the tool and how to safely hold the material without harming your hands. When the instructor was satisfied that we had successfully accomplished both tasks, we then applied Dyken layout fluid to 1-side of the bar steel and within 30 seconds it was dried and ready to be scribed. Our templates were then placed on top of the blued steel and carefully traced using a sharp metal scribe leaving marks that stand out when the template is removed.


To conclude our day 1 class, the instructor provided us with a vision of the way forward to complete our knives. He started by saying that we weren’t blade smithing (forging) our knives but instead we would be grinding them to remove material and finishing them with either handles or covers. I came to learn that covers are the term used to describe the material that encompasses a full-tang knife (or a pocket knife) and that handles are the term used to describe material that encompasses a partial tang knife (where the tang skips into the material). The instructor said that in teaching over 200 knife making classes in the past 32 years that every knife that was started was ultimately finished and that we should anticipate the same outcomes with this class. We ended on a high note, cleaned up the shop and I left the campus with a strong sense of accomplishment and satisfaction.


