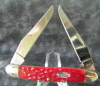
I used 3/4 x 1/2 x 1/2 side inlet elbow (90's) for the four standing corners. Put up risers into a tee with a 90 elbow right above that for the other arm. The lights are just the can type lights you see in all of them here. What I have discovered is: You need a light on both sides and one on top as well. Don't ask me why, that came from an expert, and doggone if it doesn't work real good. The scrap 2x4's on end allow the light to be put closer or further away. I have used all kinds of bulbs, but GE-Reveal (they look blue) 100w work best for me.
I used muslin (bed sheet material) about 4 ply's to diffuse the light (filter?) it enough.
As stated, each knife may need a different light. Most dark colored handles will shoot almost the same. If you try to shoot a MOP knife right after a dark bone, the same settings will wash out the pic. You will find after just a bit of experimentation, what is what. Sometimes I use on;ly the light on top and turn the other two out. However, if you want to for example;;get a good shot of an engraving, you'll need lots of light.
I use a macro setting on a relatively cheap digital camera, and play with the EV and internal light settings until I get it right.
It sounds like a lot, but it's really easy, and folks will complement you on such great photos.
If I can be of any help, email me. I also have detailed instructions ::blah:: for anyone who wants them. (no copyright infringement here,, HaHa)
Take care all, happy holidays and all that.-G







 Thanks for sharing...