I joined this site back in 2017.Since then I have learned a lot about knives and knife collecting even though I am more of an accumulator than a collector. I have had knives repaired by members on this sight and been impressed by their skills. Now I think it is time for me to take the plunge.
Last week I put scales on an old Imperial Barlow knife. I had a good time doing the repair even through it took me 4 tries I got it done. I was bitten by the knife repair bug. So I ordered some Rough Ryder knife kits to try to hone my skills before I try a repair on a good knife. I have read the knife repair tutorials on this sight and purchased the book Knife repair & restoration. So here we go. I am going to give it a try.
Regards,
Nev 52
rough ryder knife kit.jpg (30.54 KiB) Viewed 5511 times
Your doing exactly what I did the last year and a half. It is fun and you will learn more and more what the best process is in building and repairing all sorts of knife styles. I would say learn with the knife kits first. Use wood handles at first, but don't be afraid to try other materials also. Most important thing, have fun and let us see your work...
David Roberts
U.S. Navy and D/FW International Airport Board Retired
Prayer Changes Everything
@nev52 … it is a lot of fun . Mind me asking where you found a copy of knife repair and restoration. JP just told me of that work . Said it’s really helpful .
Rdubya21 wrote: ↑Tue Jan 04, 2022 2:47 pm
@nev52 … it is a lot of fun . Mind me asking where you found a copy of knife repair and restoration. JP just told me of that work . Said it’s really helpful .
Rdubya21 wrote: ↑Tue Jan 04, 2022 2:47 pm
@nev52 … it is a lot of fun . Mind me asking where you found a copy of knife repair and restoration. JP just told me of that work . Said it’s really helpful .
I picked it up on ebay. I think it was less than $11.00.
That kit is an excellent way to get started. Don't be afraid to take your work apart and redo it. That's probably the only thing that bothered me, I'd get something done that had problems, and I was too discouraged to take it back apart and fix the mistakes.
glennbad wrote: ↑Tue Jan 04, 2022 4:49 pm
That kit is an excellent way to get started. Don't be afraid to take your work apart and redo it. That's probably the only thing that bothered me, I'd get something done that had problems, and I was too discouraged to take it back apart and fix the mistakes.
And share pics of your work!
Ditto! I have a small pile of knives that I need to redo, but that discourages me. But with the few that I have, I learned to correct those mistakes.
Nev 52, I encourage you to look around at Flea Markets and try to buy a handful of cheap broken knives to work on. (I have bought a bunch of broken knives off of eBay, but they are rarely cheap now!)
Don't try to buy up every tool that you think you will need, but instead accumulate those as you go.
I rarely ever carry any knife except those that I have repaired.
This is addictive and fun!
Update on Knife repair.
I started on my knife build this morning. All was going well until Murphy’s Law struck. I had the knife assembled and had peened the bolsters as I was peening the center pin I cracked the scales. So since I had the knife together I thought I would see how it opened and closed. It did not seem like the springs had enough tension on closing so I started to take the knife back apart to fix the scales and add more tension on the springs. As I was cutting the pins I knocked the bolster off. Ok time to stop and think this out. I went over and got my torch and soldered on the bolster. Then I took a piece of oak and cut out and fitted new scales. Now for the pins. I went over and got a welding rod and a brazing rod that was almost the same diameter cut them to length. As I was getting ready to assembly the knife I decided to make it a single blade trapper. Before reassembly I added tension to the spring and started to put it back together. I sanded it with 180 -220 and 400 grit sandpaper and then took my Dremmel tool and some stropping compound and polished the bolsters. I am posting a photo of the 1st build. The only thing I am not pleased with is that you can see the pins in the bolsters. Is it because of the brazing rod and welding rod were not exactly the same size of the original pins? Any help on this would be appreciated.
Thanks for reading.
Nev52
Nev52 wrote: ↑Wed Jan 05, 2022 12:08 am
Update on Knife repair.
I started on my knife build this morning. All was going well until Murphy’s Law struck. I had the knife assembled and had peened the bolsters as I was peening the center pin I cracked the scales. So since I had the knife together I thought I would see how it opened and closed. It did not seem like the springs had enough tension on closing so I started to take the knife back apart to fix the scales and add more tension on the springs. As I was cutting the pins I knocked the bolster off. Ok time to stop and think this out. I went over and got my torch and soldered on the bolster. Then I took a piece of oak and cut out and fitted new scales. Now for the pins. I went over and got a welding rod and a brazing rod that was almost the same diameter cut them to length. As I was getting ready to assembly the knife I decided to make it a single blade trapper. Before reassembly I added tension to the spring and started to put it back together. I sanded it with 180 -220 and 400 grit sandpaper and then took my Dremmel tool and some stropping compound and polished the bolsters. I am posting a photo of the 1st build. The only thing I am not pleased with is that you can see the pins in the bolsters. Is it because of the brazing rod and welding rod were not exactly the same size of the original pins? Any help on this would be appreciated.
Thanks for reading.
Nev52
Oak trapper.jpgOak trapper 2.jpg
Very good job, just remember our mistakes are meant to teach us something. I had the same problems, but you get better each time with each knife. That knife will be something special...
David Roberts
U.S. Navy and D/FW International Airport Board Retired
Prayer Changes Everything
Nice job kit,evere job on the kit!
Don't allow little mistakes to make you discouraged or even large mistakes, use the mistake to your advantage. Sometimes you can accentuate the mistake, make it look like it's intentional and add an entirely different design element. At least it works that way once in a while!
But a cracked scale is a cracked scale. Pretty hard to do too much with that!
That does look good!
There could be a couple of reasons that the pivot pin shows: (and that is one of my pet peeves, so I understand your frustration!)
1- pin size. If the pin is too small, and you are trying to peen it out to far.
2- not peening enough. I have gone back and peened pins again and gotten them to disappear. Then again, I have gotten the pins too tight be trying that as well.
3- pin material. Not all brass or Silver Nickel has the same recipe of metals. There can be different shades of color, especially in brass. Brass from different companies can be a slightly different color. I have a friend who bought (used) what he thought was a large bundle of Silver Nickel rods, but the pins always showed badly. It turns out is was a bundle of silver soldering rods!
But you are your own worst critic: I believe that you have a knife that you should be proud of!
Thank you all for your supporting remarks. I am going to start on another knife today and see if I have learned from my blunders on the 1st knife. I will post an update when finished.
I just finished the 2nd kit. It went alot easier than the 1st kit not to many problems. I think the bolster pins are hidden better than the last knife.One thing that is driving me crazy is I keep cracking the scales I countersink the holes peen one head in the vice then installed the pin on the last hit they crack. If anyone has advice on this I would appreciate your input.
Use slow and gentle taps on the pin. I use a small hammer and pretty much just lift it up, and then let gravity pull it down. I try to control where it lands, rather than swinging it down. Tap, tap, tap, in little circles around and around. I do not hit the center of the pin often, as that swells the pin along the entire length, rather than mushrooming the end of it.
Also, I am constantly learning that I want to mushroom the head of the pin too far. A little bit is usually enough. It doesn't have to look like the head of a nail.
Once you get it down pat on wood, you discover that it is the easiest material to peen! The first bone handles that I did were cracked on nearly every pin.
Like I said, I constantly learn that I want to over-do things. A good deal of knife repair is developing a "feel" for things. You learn you are about to crack something by cracking a few accidentally. I wish that I knew an easier way to learn, but I don't think that there is.
But that means that you are on the right road, my friend!
You may also be starting with too much pin prior to peening. You also don't need to flatten that pin all the way flush with the cover material. It's okay to have a prominent head and file/sand down the extra.
glennbad wrote: ↑Thu Jan 06, 2022 2:19 am
You may also be starting with too much pin prior to peening. You also don't need to flatten that pin all the way flush with the cover material. It's okay to have a prominent head and file/sand down the extra.
This^
Start with less pin protruding. And peen the head much less. You only need enough of a peen to prevent the pin from pulling out. It’s a lot less peening than you would think. And as Glenn said you can always sand/file the pin flush afterwards.
Oh, and the knives you did look great!
Jeff
Thank you all for your advice. I am leaving the pin 1/8th above the knife. The one thing I am not sure about is should I 1st hit the pin dead on then peen ? I think I swelled the center pin on the 1st knife and pinched the spring. I had to remove the pin and repinned it 2 times to keep the knife tight but not pinch the spring. One more question I am using a .004 and .003 feeler gauges on a 2 blade knife and a .007 on a single blade.It is tight a first but after oiling and opening and closing numerous times . It opens with great walk and talk and no side to side play. Is that normal break in?
Thank you all again for your expertize on this.
Regards Nev 52



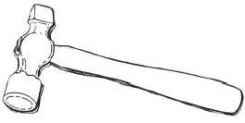











 I countersink the holes peen one head in the vice then installed the pin on the last hit they crack. If anyone has advice on this I would appreciate your input.
 Perhaps just more patient softer/slower peening will solve your problem?