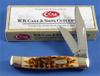
Being a Schrade-Walden, I figured it was worth saving.
This knife had some real issues that weren't evident in the seller pics (of course).
The blades are made of stainless, of course, but the springs being made of carbon steel are subject to issues!
Here is a couple of the pics I took when he arrived at my office.
First thing I noticed when I opened the main blade was the side-to-side AND up-and-down slop in the blade. What a mess! You could hold the knife by the handle and shake the blade all around!
SO.... I closed the blade and looked at the pivot end. This is what I saw.....
The spring for the main blade was almost half gone!!
Here we go.....
Well, time for disassembly.......
As I take it apart, I start seeing what dirt in between moving parts can do. The end of the spring for the main blade had been worn down and rounded off! In this picture you can see the spring above the liner with the main blade still attached.....
I put the spring for the secondary spring in a jig and marked around the end with a scribe. Then, I put the spring for the main blade in and this is when the problem became VERY OBVIOUS....
I welded some filler metal on the end of the spring and then I ground it down to the shape of the spring from the opposite side. The swinden key was still holding the blade to the liner, so I kept putting in the spring to check for fit and function.....
I noticed that the blade kick was sitting in a divot in the spring, so I filled it with weld and ground it down.
After I got the spring to the shape that I was pleased with, I hardened that end of the spring so it would not wear as fast.
(Best thing to do is..... keep your knife CLEAN and OILED! This issue shows you WHY you need to do that!)
I took the blade out of the lined and the piece of swinden key came out after some digging. The swinden key hole was packed full of HARD dirt and... whatever. After I took it out I saw this......
The swinden key was almost half worn away! SO.... you see just what dirt can do to a knife at the pivot point!!
After cleaning it up somewhat, and re-assembly, I figure I have a nice daily use knife.
Here he is all back together.......
I hope y'all learned something from this. That is why I post up these repairs.
I know some of you guys might do some things differently so, if you have suggestions and comments, they are VERY welcome!
Have a rgeat week everyone!