Easy tricks for removal scratches & Achieve a Mirror Fin

This forum is for posting step by step techniques used in the art of making, customizing, and repairing knives. Please stop by and teach a few things or maybe learn something new from the talented members of AAPK.
Post Reply
User avatar
Timstools
Posts: 105
Joined: Thu Aug 09, 2007 9:46 pm
Location: Island Tasmania Australia

Easy tricks for removal scratches & Achieve a Mirror Fin

Post by Timstools »

Have you ever pulled out your old Schrades and seen marks, dings and scratches on the solid brass or nickle silver on the handle of an otherwise perfect knife. have you ever wished you could do something about it. You can? It will usually take between 1/2 an hour to 2 hours to restore a knife often to a better finish than it had when it was in mint condition.
I have done this many times (see pics below) with great success.

You will need to buy some super fine Micro mesh abbrasive paper and use it by hand. This is Jewelry grade cloth backed abrasive used for removing scratches in glass etc.
I use different grades and start with the rougher grades depending on how bad the ding or mark is. The roughest I would recommend using for any mark is 800 grade.

Before doing anything use some masking tape and tape off areas you do not want to remove finish from. Then clean your knife either with 6000 grade mesh or use preferably Jewelry grade polish (dont get it on etching etc) This is very important, you wont be able to see all the marks on your knife unless it is cleaned from oxidation.

Then put it under light and go over it to see what marks and how deep they are.
The deeper the marks are the courser grade mesh you will have to use and this will mean it is going to take much longer because the courser grade mesh will leave scratches that will need to be removed latter.

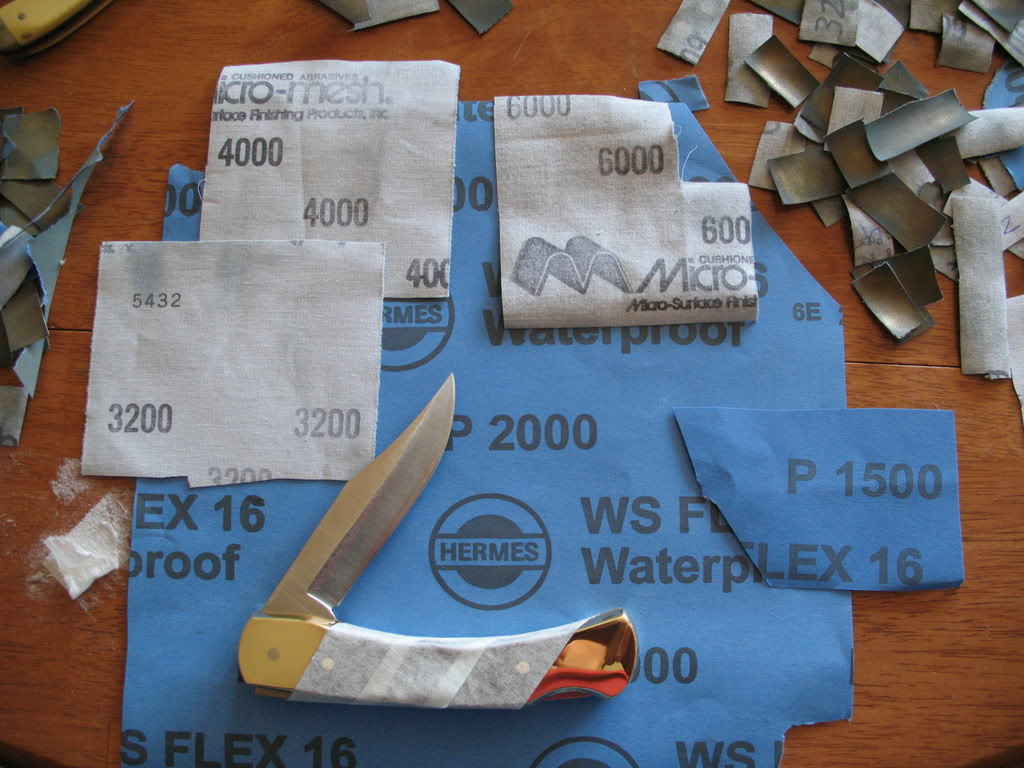
Make a work area and sit knife on soft cloth on table. First try and see if the marks will come out with a finer mesh like 3200 grade 2000 grade or 1500.If no success and the marks are deep you will have to use 800. Cut lots of small peices (as in pic) you will notice that the mesh clogs quickly with the brass or nickel so use lots peices in quick succession this will save you time.
If you have to go to 800 to remove marks you will need to then use 1200 to remove the light scratches that the 800 caused. Next 1500 then 2000 each one improves the last. 3200, 4000 and then lastly 6000.

These are the only grades I tend to use and there are some wide gaps between them (4000 to 6000). A way around this is just before using the 6000 grit use the 4000 with a peice that is a little glogged it will act a little similar to a 5000 grit.

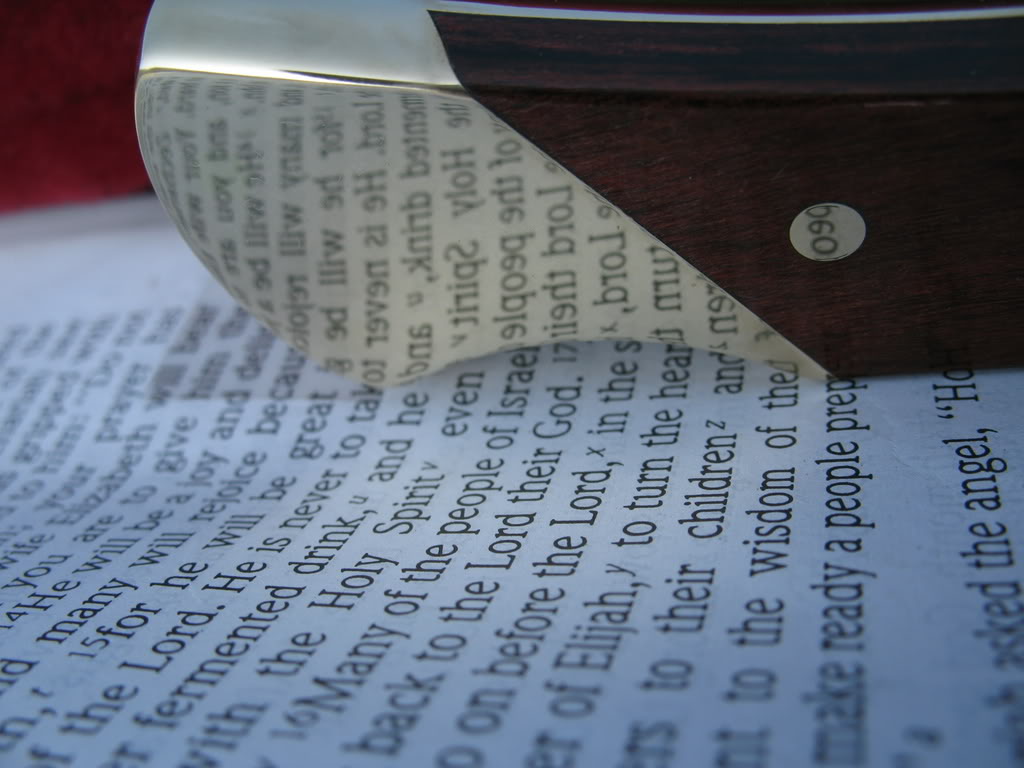
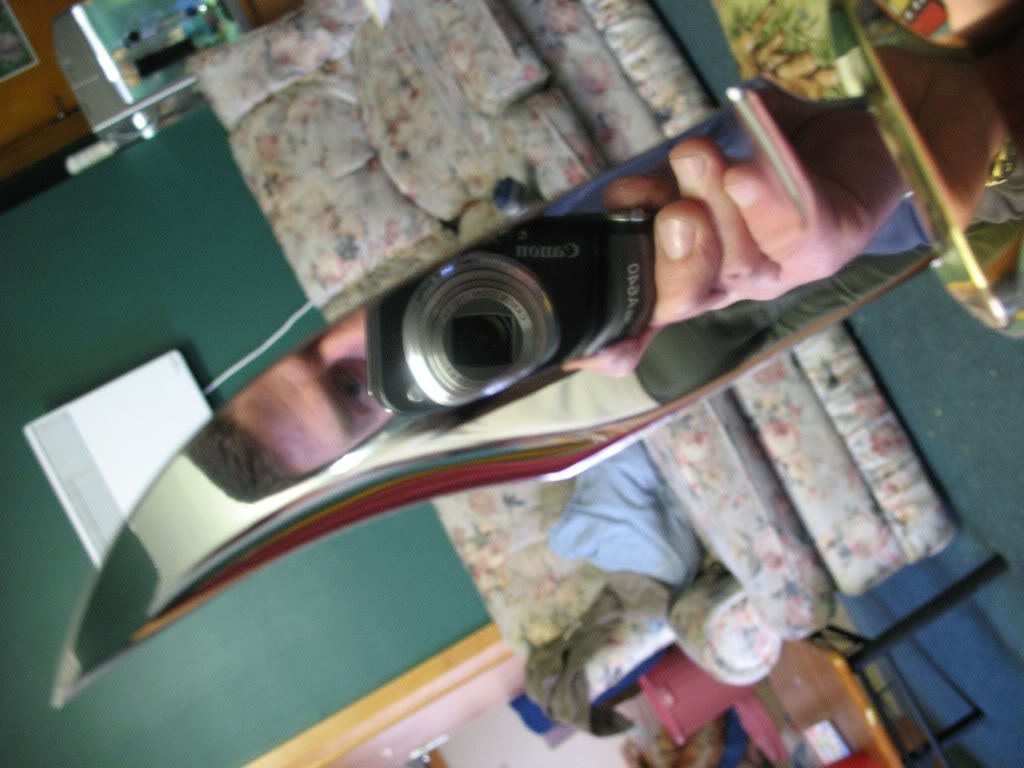
If you do it right the finished result is simply stunning. You should easily be able to see your reflection in the completed area.

Below are some of my projects, see lens in pic.

The Micro Mesh abrasive usually has a cloth packing so you can wash and re-use it. Anything up to around 2000 grit should be able to be purchased from a car auto paint supplier and is usually paper backed and much cheaper, I use both paper backed and cloth backed for this reason.
Oh and lastly be careful you dont cut your fingers and if in doupt practise on an old cheap knife first.

Additional Note: Recently I have used the cutting paste below for getting an incredible mirror finish on some of my blades. It the best product I have used so far. You could probably use a little less of the sheets of abrasive and this instead, it is excellent. I used a powerful drill with a buffer held between my knees while standing. I dont recommend holding it this way as its unsafe. Be careful to hold the blade on the buffing wheel so as not to dull the edge of the blade. It will dull the edge a little but can be re-sharpened easily. I purchased the paste from and Auto paints store Ive tried cheap repco cutting compound with no or little effect this large tube below was $26 AUD & well worth it.

If you decide to polish a blade then please appreciate the difference in the amount of work required to polish to a Mirror finish a standard Brushed metal semi gloss blade and one that already has a smooth high gloss finish.
Regards Tim

Image

Image

Image[/IMG]

Image
Image

Image
A KNIFE IS A THING OF GREAT BEAUTY
User avatar
snorkel
Posts: 243
Joined: Mon Mar 15, 2010 7:55 pm

Re: Easy tricks for removal scratches & Achieve a Mirror Fin

Post by snorkel »

I tried this on a LB7 and it worked great.

I had one that was pretty beat up so I started with 120 grit to get all the scratches etc out.
then I went to 150, then to 220.
After 220 I wet sanded with water to 1500 and it turned out incredible. Wet sanding really makes a difference.
After I dried it off I coated everything with breakfree CLP.
I only had 1500 grit so I had to stop there :-)
User avatar
orvet
Gold Tier
Gold Tier
Posts: 19348
Joined: Tue May 16, 2006 6:23 am
Location: Willamette Valley, Oregon

Re: Easy tricks for removal scratches & Achieve a Mirror Fin

Post by orvet »

I use 3M Polishing Paper from 30 micron to 1 micron (400 grit to 8000 grit).
Jantz carries it & it comes in 9" X 11" sheets for about $1.20 each.
They are a bargain and they really work!
I used to use wetordry sandpaper up to 2000 grit, but the polishing paper leaves a much finer scratch pattern. By the time I get to 8000, it is nearly a mirror finish. It only takes a quick pass on the buffer to get a mirror finish.

Dale
Dale
AAPK Administrator

Please visit my AAPK store: www.allaboutpocketknives.com/orvet

Job 13:15

"Buy more ammo!" - Johnnie Fain
“Evil is Powerless If The Good are Unafraid.” – Ronald Reagan
MikeA
Posts: 59
Joined: Wed Aug 22, 2012 1:12 pm

Re: Easy tricks for removal scratches & Achieve a Mirror Fin

Post by MikeA »

Hello,

I didnt see the name of the polishing compound you recommended. Can you please repost.

Thanks

Mike
User avatar
jerryd6818
Gold Tier
Gold Tier
Posts: 39174
Joined: Sun Jan 04, 2009 5:23 am
Location: The middle of the top of a bastion of Liberalism.

Re: Easy tricks for removal scratches & Achieve a Mirror Fin

Post by jerryd6818 »

Mike -- This is an old thread and Timstools hasn't visited AAPK in a couple of years. The polishing paste he was talking about may not be available here in the states anyway since he was (and still may be) located in Tasmania Australia.
Forged on the anvil of discipline.
The Few. The Proud.
Jerry D.

This country has become more about sub-groups than about it's unity as a nation.

"The #72 pattern has got to be pretty close to the perfect knife."
--T.J. Murphy 2012
MikeA
Posts: 59
Joined: Wed Aug 22, 2012 1:12 pm

Re: Easy tricks for removal scratches & Achieve a Mirror Fin

Post by MikeA »

Thanks Jerry for the reply. I googled him and tried several options but nothing. I also tried to find some compounds that would equate to 26 EUD and again nothing.

So I am venturing out on my own and have bought several compounds at the car store with different grades of function from cutting to final polish. I am restoring a Camillus that was in poor shape. I have taken some pictures as I go along and if it comes out well then I will post them


appreciate you reply

Mike
User avatar
orvet
Gold Tier
Gold Tier
Posts: 19348
Joined: Tue May 16, 2006 6:23 am
Location: Willamette Valley, Oregon

Re: Easy tricks for removal scratches & Achieve a Mirror Fin

Post by orvet »

Mike,
Please post pictures of the finished knife.
Also please let us know if you find a good polishing compound.
It is always good to try new & different methods, that way you will have options when encountering a particularly difficult knife.
Dale
AAPK Administrator

Please visit my AAPK store: www.allaboutpocketknives.com/orvet

Job 13:15

"Buy more ammo!" - Johnnie Fain
“Evil is Powerless If The Good are Unafraid.” – Ronald Reagan
MikeA
Posts: 59
Joined: Wed Aug 22, 2012 1:12 pm

Re: Easy tricks for removal scratches & Achieve a Mirror Fin

Post by MikeA »

Thanks Dale,

Will do. Having a great time regardless. Something about taking a piece of metal and turning it into a knife is very rewarding.

Mike
MikeA
Posts: 59
Joined: Wed Aug 22, 2012 1:12 pm

Re: Easy tricks for removal scratches & Achieve a Mirror Fin

Post by MikeA »

Thanks for all the input Dale,
You told me to go ahead and send a picture of my knife build. Well here it is. I am happily unhappy if that makes sense. Per all of our previous discussions No matter how hard I tried I want really unable to remove the scratches the way I wanted. So I am calling them birth marks of my really first knife. I made one back in 72 but it was only on a grinder and was rough. This was my first true effort.
I used an M1 Camillus Blank and washers from ebay, the MK2 guard and butt end from ebay too.

The imperfections only make me want to try again and avoid the mistakes and work with the advise I have gotten along the way on this forum. My next one will be better.

Wasnt sure how to really shape the leather handle without messing it up so I left it oval. I thought once I remove the leather I cant put it back and I worked to get it to this position so why screw it up.

My next gun show I will pay more attention to details on the knives of the true makers out there. Makes you appreciate you guys and what you do!!!!
Mike
Attachments
IMG_0074.jpg
User avatar
orvet
Gold Tier
Gold Tier
Posts: 19348
Joined: Tue May 16, 2006 6:23 am
Location: Willamette Valley, Oregon

Re: Easy tricks for removal scratches & Achieve a Mirror Fin

Post by orvet »

Great first effort Mike! ::tu:: ::tu::

You can shape the leather on a belt sander.

Did you clamp the leather rings down under pressure?
That helps to keep them from loosening when they dry out a bit, which they will do.
Dale
AAPK Administrator

Please visit my AAPK store: www.allaboutpocketknives.com/orvet

Job 13:15

"Buy more ammo!" - Johnnie Fain
“Evil is Powerless If The Good are Unafraid.” – Ronald Reagan
MikeA
Posts: 59
Joined: Wed Aug 22, 2012 1:12 pm

Re: Easy tricks for removal scratches & Achieve a Mirror Fin

Post by MikeA »

This may sound strange but I took the washers and put them all in my vise and cranked it down and left it there and tightened them over a period of time and then when I drilled my hole for the pommel I made sure it was butt tight against the washers. Then I ground off the end tang sticking out. Penned it a bit. So I think that the leather had a chance to swell back up and they arent moving anywhere. I decided not to glue the washers together but just let them free float so to speak.

I can focus on turning the handle down now with my 1 inch sander or even the curve of my 4 I think will work fine.

Appreciate the advice and will go slower on my second effort.

Mike
User avatar
orvet
Gold Tier
Gold Tier
Posts: 19348
Joined: Tue May 16, 2006 6:23 am
Location: Willamette Valley, Oregon

Re: Easy tricks for removal scratches & Achieve a Mirror Fin

Post by orvet »

If you can find some light weight belts, like the J-weight belts made by Klingspor in Germany, they are quite flexible. If you can use a slack belt (unsupported) on your sander you can probably shape it easier.
Dale
AAPK Administrator

Please visit my AAPK store: www.allaboutpocketknives.com/orvet

Job 13:15

"Buy more ammo!" - Johnnie Fain
“Evil is Powerless If The Good are Unafraid.” – Ronald Reagan
Post Reply

Return to “Knife Related Tutorials”